

Pirates in Paradise 2007 - Key West, Fl
Chapter 6th - Of the second day that Pirates in Paradise was officially open to the public, with a complete accounting of the capture, attempted rescue and final release of The Mercury's Quartermaster, a brief discussion of the trial of Mary Read and Anne Bonny, pirates on parade, an enjoyable outing with Bilgemunky and more blathering about the surgeon's continuing fascination with the Pyrat Pub.
December 1st, PM Today was a full day of pirate activity. I confess I arrived somewhat later than the opening time of 10am due to delays in the breakfast schedule at Blue Heaven this morn. (Weekends in Key West are just sucky at restaurants. During the week, you can get anything you want...excepting Alice.) I was sitting at the bar, nursing a coffee (No, I don't want any hair of the dammed dog, thank ye) when I finally hit upon the strategy of turning around and facing the customers in full pirate garb. I wish I had a photo of this. Of course, I had a table shortly thereafter with three apologies from the hostess...two apologies before and one once the table (a table for four, not two) was secured. Following another excellent repast, I repaired to the fort just in time for the trial of Anne Bonny and Mary Read. The trial went badly for Anne and Mary until they came up with a suitable excuse. Justice is served, with a side of coleslaw.
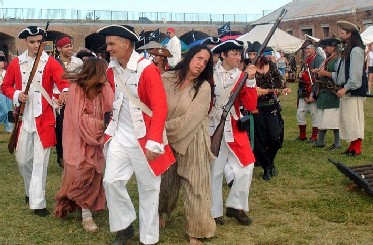 Photo: Tony Callahan
Leading Anne Bonny and Mary Read in for the tryal. Note our intrepid pyrates Rusty "Wild" Rice, Captain Jim and Patrick Hand at right - doing nothing. |
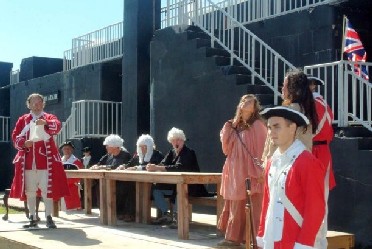 Photo: Tony Callahan Ordering the court: Harry Smid in English red reads the charges to a panel of judges seated at the table while Anne and Mary roll their eyes. |
 Photo: Tony Callahan Original Cyn and Cascabel - the pub owner's testimony. |
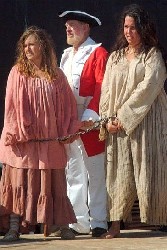 Photo: Tony Callahan Anne (Bawdy Bee) and Mary (Diosa) on trial! |
 Photo: Tony Callahan Harry Smid swears in Captain Braze, Bone Island First Mate, who played someone whose name I forget in the tryal. |
Our dear quartermaster, William Red Wake, was slapped into irons by the traitorous Captain Sterling for crimes he may not have committed. I took several photos for William - what with him being in irons and all.
Photo: Silkie McDonough
The Captain of the Archangel and crew hold our Quartermaster
hostage.
(From left: Captain Sterling, Abigail M. Normal, William "the
prisoner" Red Wake, Mad Mary Diamond, Sarah Sterling and Joshua
Merriweather.
William did manage an escape at one point, only to be re-captured (see the saga of William's escape and recapture below). Anne and Mary may have gotten out of their charges, but William got chained to a tree in the Archangel camp.
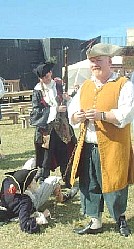 Photo: Silkie McDonough |
 Photo: Silkie McDonough |
 Photo: Silkie McDonough Photo: Silkie McDonough
|
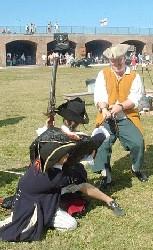 Photo: Silkie McDonough Photo: Silkie McDonough
|
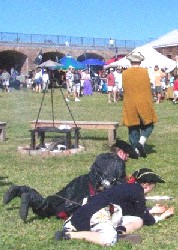 Photo: Silkie McDonough
|
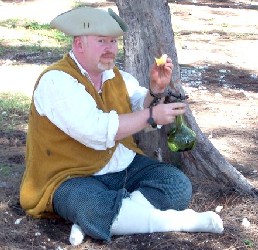 Photo: Silkie McDonough The saga of Quarter Master William Red Wake's escape... and the result. At least someone gave him an apple while enjoying the Archangel camp's hospitality. |

Photo: William Red Wake's camera
Being the surgeon and second
officer from the Mercury, I attempted a rescue of first officer Quarter
master William using my trusty capital knife, bone saw and tourniquet before
being pulled off by the Archangel munchkins (...and being kicked off by
William. Film at 11... Amanjiria really has a knack for this.) Several other
members of the crew also attempted a rescue but the Archangel munchkins
resisted and we have the thing up as a loss. This made me the first officer
of the Mercury which was just what I hoped would...was just awful.
Right: "I...have a cunning plan... I think I can help you out of those cuffs...now if you'll be a big boy and just sit still while I amputate your hand..."
The Pyrates attacked the Fort later in the day and damaged the outer wall with their cannon as well as damaging the redcoats with their muskets. Several of us than charged the fort from the inside. A pitched black powder gun battle between the redcoats and pyrates ensued. I then got the chance to do some of the doctoring that I failed to do yesterday. The pyrates won the battle handily and my patient (Mr. O'Keefe) survived both Lily and I. The fort colonists then brought the prisoner (QM William of the Mercury) forward and offered negotiations. Much against my better judgment, I, now first officer of the Mercury, was elected to negotiate which (unfortunately) was successful. The rebels joined us and the redcoats were left to rot on the field (until they got up which was probably due to the miraculous ministrations of the Mercury's surgeon whose mere presence was surely a boon to them.)
 Photo: Jaded Jetty (jetgoff) |
 Photo: Jaded Jetty (jetgoff) Mission, your ship's surgeon, tries diligently to dress battle wounds while Haunting Lily tries to profit by stealing shoes. Hmm... |
Everyone repaired to a convenient tent in the fort out of the brilliant sun
while Captain Sterling went to scrounge up the key to the shackles that held
William. I got a chance to display my medicine chest and surgical tools to
all interested photographers and was able to explain bits and pieces of the
info I had learned in preparation for the role. After much audience
suffering as I explained my kit for the 12th time, William was released and
we went back to camp.
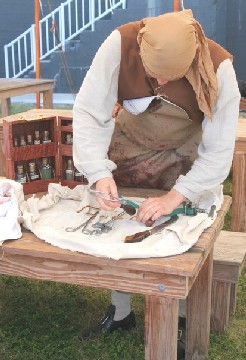 Photo: William Red Wake |
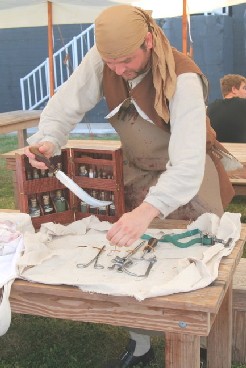 Photo: William Red Wake
|
 Photo: William Red Wake
|
Above: The ship's surgeon sets up his kit and shows off. (What can I say? I'm a ham.)

Photo: William Red Wake
I decided to head into town and have dinner as no one in
the camp seemed inclined to make vegetarian anything and had a wonderful
corn and crab chowder stew at the Rum Barrel. It was so good that I went back later and had
more corn and crab chowder stew again. But I digress.
Mary Diamond (at right), William and several members of the Archangel crew headed off for a sunset cruise aboard the Liberty Clipper, where Amanjiria was apparently photographed naked kissing a mermaid. Wait...he was actually photographed in the rigging of the ship. (You can see this photo in middle of Chapter 1st.) The mermaid story sounds better, though. (I may regret having written that. Your ship's chirurgeon makes bold his statements. If I don't finish this chapter it's because I've been gutted and flayed).
We then gathered at the beach for sunset where master photographer Tony Callahan proceeded to take what were probably hundreds of pictures of we, naught but humble pirates. Tony also took a great many pictures last year which he and his wife Fayma turned into wonderful posters that were scattered all over Key West during the festival. (Perhaps I will rate a poster next year. Perhaps it will be made into an advertisement for Quaker Oats.) Tony's website for Callahan Digital Arts has been the source of many of the photos you've been enjoying here.
 Photo: Tony Callahan |
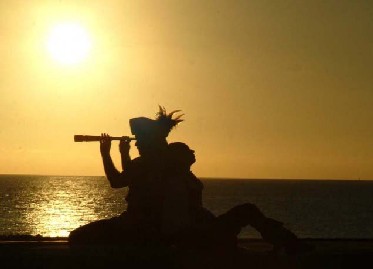 Photo: Tony Callahan |
Above: Samples of Tony's work. At left, Edward O'Keefe at sunset; at right, two members of the Sacred Heart Crew.
We all assembled for the annual Key West holiday parade where we marched as members of a float advertising something I don't even recall which looked like a galleon with a huge skull figurehead. (No, it really didn't make any sense in real life either, but it was sort of cool for a skeleton-favoring ship's surgeon.) The parade route was 17 miles long in period correct shoes (which is about two miles long in cheater shoes. My feeeeeet!), but great fun was had by all. I will now appear in thousands of people's vacation photos and videos, which is charming on one level and just disturbing on another. Never in my life have I been willingly photographed so many times.
 Photo: Mary Diamond |
 Photo: Mary Diamond |
Above left, the parade float with it's guides; above right, several pirates on parade traveling what may be Duvall street.

Photo: William Red Wake (I think)
See anything? (I see a bag and a lantern...)
Post-parade, Bilgemunky and I wandered off together to get more Rum Barrel corn and crab chowder at
my suggestion and had a wonderful discussion about my surgeon character and his on-line pirate music radio
show (modern and vintage - you can listen to the show on his
site on Monday evenings). We bought a bottle of rum after dinner
and went to the Pyrat Pub in the fort which bested any pub on Duvall
street. (Sorry, pub owners on Duvall street. Ah, you'll never read this...)
When we arrived in the pub with Edward O'Keefe, we met Patrick
Hand, Captain Jim and Rusty "Wild" Rice, who had been kicked off Duvall for
weapons infractions. (Not because they were carrying flintlocks guns,
because they were carrying swords!!) Much rum was drunk and Captain Jim
claims to have seen Jesus or Hulk Hogan (you pick) in the folds of a canvas bag in William's tent.
Naturally, this is ridiculous, because...ah hell, it's after 3am - time for
bed. You judge the picture for yourself. I'll tell you more once the world stops spinning...