
Scarecrow Haunted House Prop Pages: 1 2 3 Next>>
The Scarecrow Prop - Page 2
Scarecrow Details
Of course, having an idea and actually acting upon it are two different things. For several years the leaves would start to change, I'd start thinking about the scarecrow prop...exploring, adding and refining my ideas...and by the time I was excited about it, the leaves would all be on the ground, completely drained of color. So in 2010 I decided not to let this happen again. (Besides, I had no other prop to create so I figured I may as well do this one.)
Scarecrow Construction - Creating the Wooden Skeleton
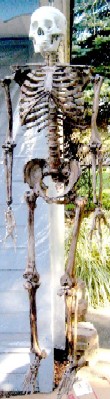
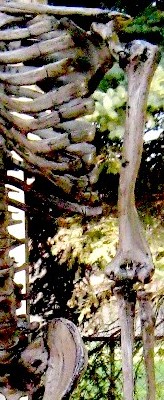
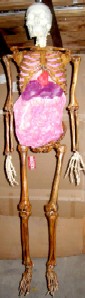
To start the project, I picked up a Bucky skeleton on eBay. Buckys are just standard, as-cheap-as-possible jointed plastic skeletons. I needed to make him look like he was made of wood, so I Googled and found this website which explained how to do that using sponges. I followed their procedure of using acrylic paint applied on sponges, going from the darkest coat to the lightest. You can see the results below. I wound up using only two colors: burnt umber and standard brown. I coated it with clear-coat spray-paint between coats to make it waterproof and less likely to rub off when sponging.
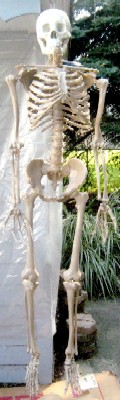 Unpainted Skeleton |
 Dark Brown Skele |
 Close-Up of Dark Brown |
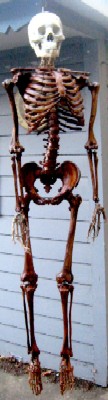 Brown Coat |
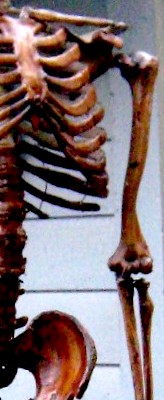 Close-up of Brown Coat |
Scarecrow Construction - The Leaf Organs
Nah, nah... Too Complicated
The organs were a bit trickier. I didn't relish the idea of
trying to sculpt organs just to go and hide them under a layer of glued-on
leaves, so I looked for something with pre-made organs to
fit into the Bucky.
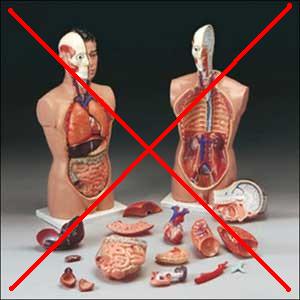
I first stumbled across the Tall Paul Torso (right). Paul contains plastic organs which can be removed for teaching. My idea was to glue prepared leaves onto the organs and put them in the Bucky. Unfortunately, that idea was expensive and the organs didn't fit Bucky well. (Which means it was also dumb.)
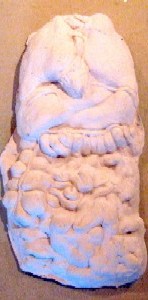
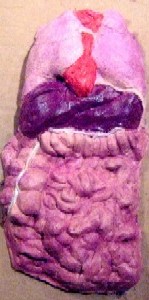
A bit of internet research revealed that there were companies out there making foam-backed latex "Bucky Guts," so I did found and purchased an unpainted set from an outfit named Mr. Skeleton. (How could I resist a company with a name like that?) Unable to predict how the leaf-gluing thing would turn out, I decided to paint the organs before applying the leaves in colors that I thought would match. Painting latex like this is a bit tricky, but by following the recipe I found on this webpage, all came out well.
The Organs with Leaves
The next part of the process was creating the leaf organs.
I found the various colors of leaves I wanted in a
little park near my house. (I figured it would be easier to get them from a
public park than ask someone permission to take the leaves off the trees in
their yard. "Uh...can I take your leaves so I can make guts for my
scarecrow...oh, never mind.")
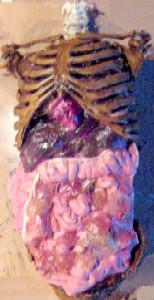
I applied the first set of leaves to the lungs using clear polyurethane (to protect the leaf) and rubber cement (because clear polyurethane proved not stick very well). Then I waited. Once dried, the leaves turned brown. This is why the lungs are so dark on the finished prop (below center right). I thought this was because the leaves had absorbed the rubber cement and polyurethane and aged. So I decided to dry the other leaves out more before applying them. From this website I learned how to microwave leaves. (Kids, do not try this at home; they can catch fire, which sounds cool, but explaining this later will be a pain.)
I used Modge Podge rather than rubber cement and polyurethane and then proceeded to put my newly dried leaves on the prop. They looked goopy at first, but once dry, they were pliable and clear. (As you sort of see on the prop left.) I covered everything in leaves but the intestines, which I only partially covered to make them look realistic (and more gross).
 Unpainted Organs for Bucky |
 Bucky Organs Painted |
 Inside Bucky |
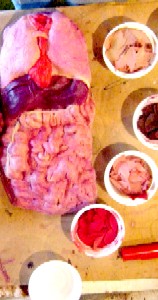 Preparing to 'Leaf' the Guts |
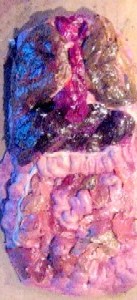 Organs with Leaves |
Scarecrow Construction - Skinning the Skeleton
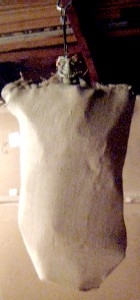
Burlap-Wrapped Torso
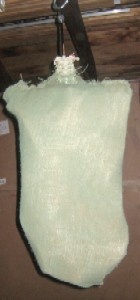
Torso Painted Green
Once the internal organs were done, it was time to wrap him
in skin. I used burlap for skin which matched the mask. Because burlap has a loose
weave, I first taped a bit of cardboard around the organs so that the paint
needed to match the mask would not leak through when spray-painted.
I wrapped the torso in burlap "sewing" it closed using steel wire. (I would have preferred twine but that would require real sewing, so that was out.)
I painted it first with a layer of moss green and then highlighting with white (right). Next were the extremities. First I took some old leather gloves I had used for staining wood and painstakingly put them on the skeleton's hands (with emphasis on "pain" - skeleton fingers do not like to stay straight - below left). I added some paint to make them look "bloody" and then proceeded to wrap the arms (and eventually legs) in burlap skin. I attached the extremities and painted them as above. You can see the paint steps below with the mask on the final prop below right.
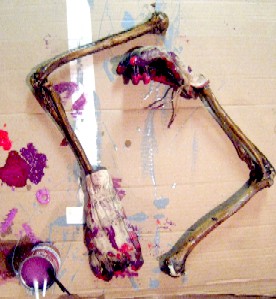 The Scarecrow Arms with Gloves Fasted On to Them - Bloodied for Effect |
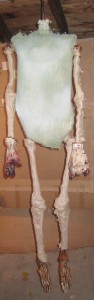 Burlap Covered Extremities |
 Green Painted Extremities |
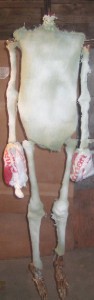 White Hilighted Extremities |
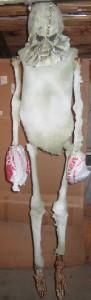 Skinned Scare- Crow w/ Mask |
With that the body was essentially finished. It was time to move on to the details.