
Brain Gremlin Model Pages: 1 2 3 Next>>
The Brain Gremlin Model, Page 1
A Top View of the Little Brown Bat
The life-sized Brain Gremlin prop was something I'd wanted ever since seeing the movie in the 90s. As I explained on this site's main page, he is one of my favorite movie characters because he embodies all the worst traits of intellectuals. I figure I am just about that sort of intellectual - twin minds with but one thought.
Anyhow, when I created MarkCK.com in... 1998?... I wanted an image of the Brain Gremlin for the front page so I could stick his monologue there with him. (The web is a visual medium after all.)
I was pretty concerned about copyright violations, so I got the bright idea of making my own Brain Gremlin model and photographing him instead of using a studio image. OK, creating a model for a photograph is a bit elaborate. Truth be told, I wanted a full sized model of the brain gremlin and the photograph thing was just kind of an excuse.
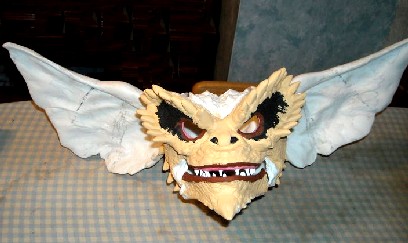
That idea simmered for awhile until I discovered that there was a life-sized gremlin model out there in 2000. The only problem was that it wasn't one of the standard gremlins (which is what the Brain Gremlin is), it was of Mohawk.
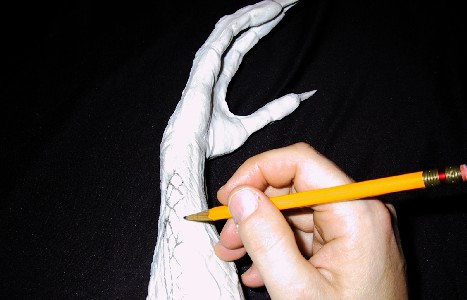
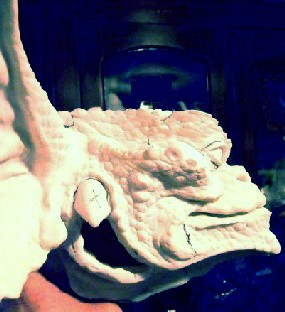
Me, Optimistically Drawing the Patterns I Intended to Carve in the Vinyl
The Mohawk gremlin was designed to look more evil with all sorts of added fins, smaller eyes and other added bits and pieces. The upshot is that the model would require some reworking. But I decided I could do it, so I got a vinyl Mohawk model knockoff on eBay for the princely sum of $210. (This sounds expensive, but it was nothing compared to the financial burden this project would incur before it was done.)
Then I started working on him with a hand tool. I did this religiously for about a week or two before I realized that this project needed something more than a hand tool. So I put the gremlin away for a while. OK, for about 8 years.
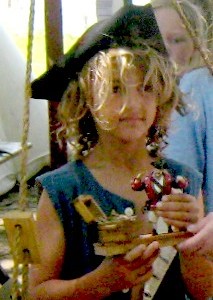
Bradley With Dan's Pirate Figure
Bradley with Dan and the Pirate Figure
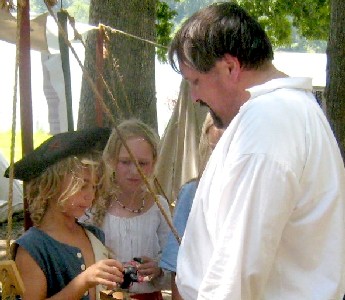
Fast forward to 2008. I was at a pirate re-enactment in Indiana where I saw a custom-made pirate action figure sold at an auction which had been sculpted by Dan Needham. It was quite detailed, so I asked Dan how he had done it. He explained that it had been a Mr. Incredible action figure which he had repurposed and made into a pirate. I told him about the gremlin project. Dan said he was interested. So the project got a second life and Mohawk went to live with Dan for a few years.
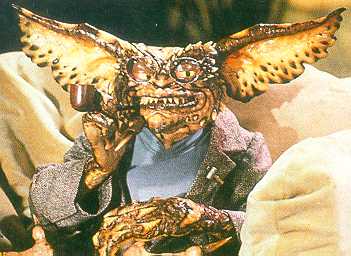
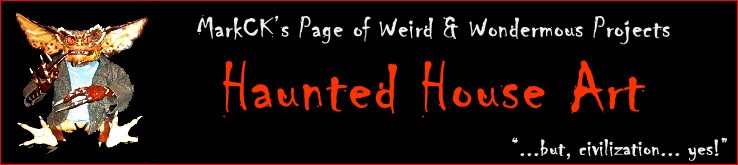
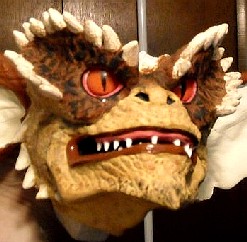
The Brain Gremlin As Seen in the Gremlin's 2 Card Set
A couple years sounds like a long time, but I was really not in a great hurry to have this project finished at this point. Although I had been worried about copyright considerations generated from the scanned image of the Brain Gremlin from the Gremlin's 2 card set (seen at left), it had been used on my website for many years by the time I found Dan. I had never been told I couldn't use it, so having the model to get a copyright free picture was no longer a concern. (In fact, there are now a variety of images of the Brain Gremlin on the web. When I first posted my website the movie was not on DVD so there wasn't much in the way of images to work with. How the times do change.)
Something else had happened between my purchasing this model and my giving it to Dan to work on: Neca Toys had come out with a 12" rotocast Brain Gremlin figure. Since it was a good likeness and gave Dan a 3D reference, I loaned him mine to use as a reference.
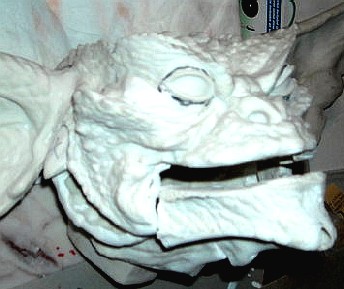
Dan had to put a tremendous amount of work into removing a variety of fins and other useless, but evil, looking, flair that Mohawk came equipped with. He began with the head of the model which was key to the project since it would be the most visible piece. Compare the image below to the head of the image above right and you will find a variety of differences. The eyes of the model are deeper set and much smaller than the Brain. The nose is more flared and open. There are fewer spikes under the jawline and those that are there are much larger than Brain's. The spikes around the eye are almost nonexistent - they used ridges on Mohawk Plus there's that HUGE wattle which runs from his mouth down to the upper part of the chest. The ears were too long and more 'ragged' along the bottom edge. On top of that, one of the Brain Gremlin's key features is his teeth, which can't be seen on the Mohawk model.
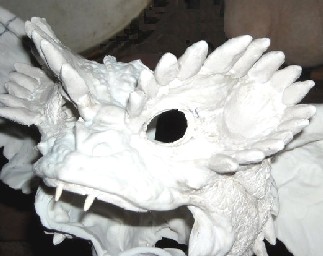
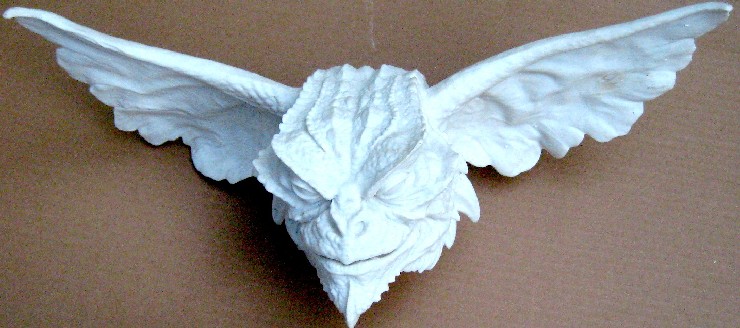 The Head of the Original Mohawk Model |
Dan began by removing the wattle and part of the chin and the overlarge spikes found under the jawline. The 12" Brain figure is seen in the first image as a reference for the chin.
 Dan Resculpting Gremlin - Removing the Mohawk Chin and Spikes |
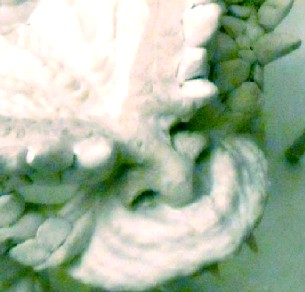
 Close-Up of the Spikes Removed From Under Jawline |
His next step was to cut the jaw so that it could be opened up to reveal the teeth. You can see one of the lines he drew on the model to indicate where the cut on the lower right jaw would take place in the image above right. The planned placement of the open jaw is seen in the image below left. Note that this also shows the pencilled outline for removing the eye.
After that, Dan sculpted the under jaw spikes and placed wooden dowels along the brow of the model which could serve as the basis for the spikes around the eyes that would replace Mohawk's horned ridges. All of these modifications are seen in the image below right.
 Dan Resculpting Gremlin - Removing the Mohawk Chin and Spikes |
 Close-Up of the Spikes Removed From Under Jawline |
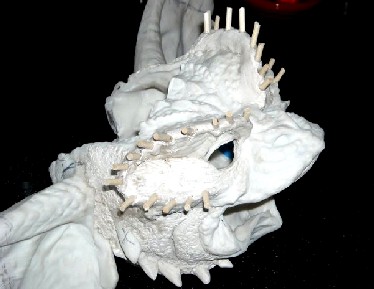
With the pegs in place, Dan sculpted the eye spikes on them. You can see them in the two photos below. To install the wooden dowels, he drilled holes in the head, inserted dowels and used a lot of wood/white glue to make sure they would stay in place. The horns were then hand-sculpted around the dowels. For sculpting and resculpting pieces, he used an air drying clay. "I gave them plenty of time to dry and sanded them to the shape I wanted."
He now began to work on the teeth, placing wood spikes in the mouth. The first two teeth in the upper jaw are visible below as well. Note also the pencil lines on the ears in the photo below left in preparation for their resculpting.
 The Eye Horns and Mounting of First Two Teeth in the Upper Jaw |
 Close-Up of the Eye Horns and Two Teeth in Upper Jaw |
With these sculpted, Dan filled in the sunken-in eyes and reamed out the eye sockets so that they would be correctly sized for the taxidermy lenses I had purchased for the model. (I have noticed that nothing makes a sculpture look better than realistic-looking eyes. I used Van Dyke's Poppy Slit Pupil Reptile Eyes. I don't have the receipt any longer and it's hard to tell with them buried in the model, but I believe I used the 20mm size.)
Dan completed the creation of the teeth in the upper and lower jaws. (The teeth in the lower jaw are a bit hard to see in the image below left, but they are there.) Dan also resculpted the nose to make it more like the Brain Gremlin's larger, flatter nose with less flared nostrils.
 Dan's Resculpt - Teeth, Nose & Eyes Built Up, |
 Close-up of Gremlin's Resculpted Nose |
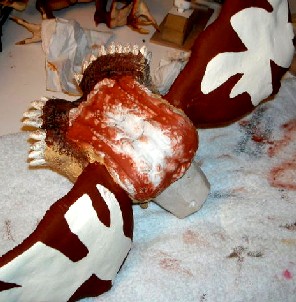
Everything was now sculpted for the head, so Dan reattached the jaw and blended it into the rest of the head with air-drying clay. He also cut away the back of the head so that he could gain access to the inside of the mouth.
The next step was to paint the head. Following the paint scheme used on the 12" action figure, Dan carefully brush painted each color. Below left, you see the Black undercoat around the eyes painted along with the teeth and gums. Below right (in a more finished state), you can see the paint job on the inside of the head through the hole Dan cut in the back - mostly including pink around the eyes and the mouth.
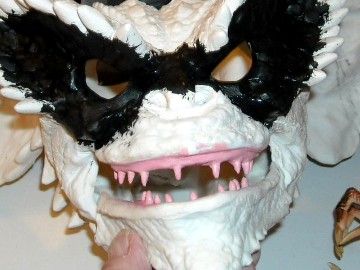 The Teeth, Gums and Eyes Painted on the Resculpted Gremlin Head |
 The Inside of the Mouth Seen Through the Hole in the Back of the Head |
Below are some shots of the painting of the Brain Gremlin model's face in progress. If you look closely at the back of the jaw of the face in the image on the left, you will see Dan's work resculpting the jaw attachment point to blend it into the rest of the face in white. Below right is a comparison of the face painting to the 12" action figure.
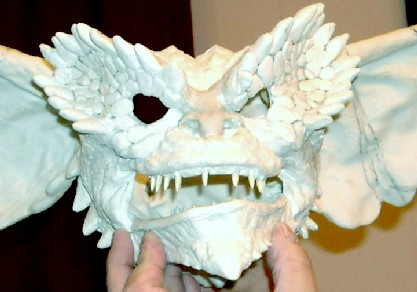
 Attachment of the Mouth Modeling & Tan Coat of Paint on Face |
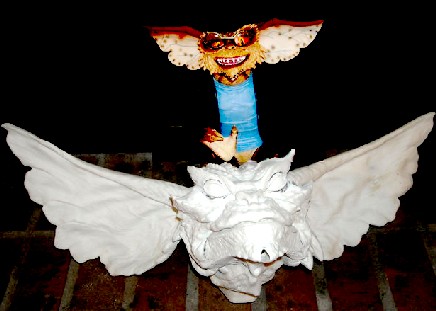
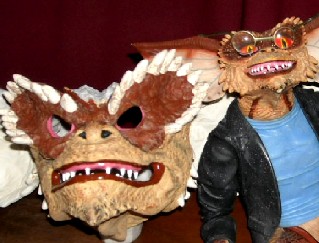 The Paint on the Model's Face Compared to the 12" Figure |
 The Back of the Head with the Cut Out Panel Glued Back in Place & Some Paint |
 Paint and Repair of Cut Out Panel in the Head |
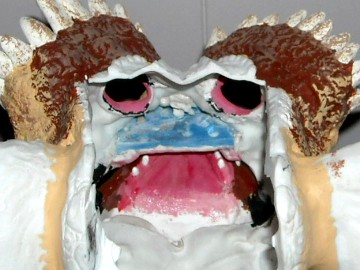
Below are some photos of the front of the model, face paint completed, glass eyes installed and ears remodeled.
 Close-Up of Dan's Finished Paint on the Face |
 The Brain Gremlin's Face Paint and Eyes Angled - The Paint on the Ears Is Not Yet Finished |
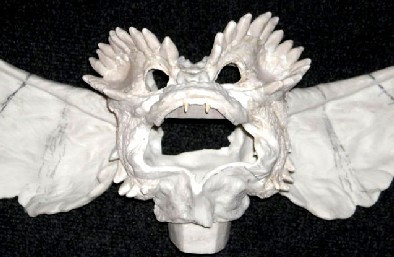
And this is the finished Paint Job on the head by Dan Needham. Next came the resculpting of the Mohawk model's body.
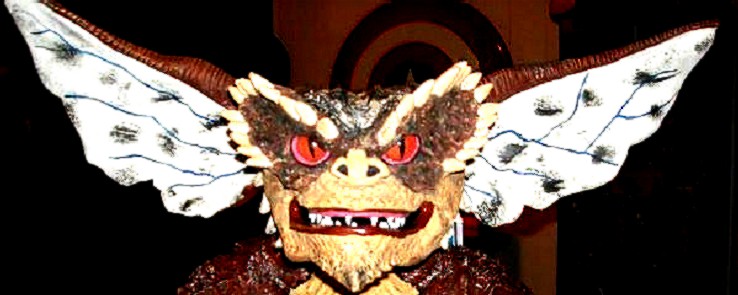 The Brain Gremlin's Final Head Paint Job by Dan (Seen here mounted to the finished torso.) |